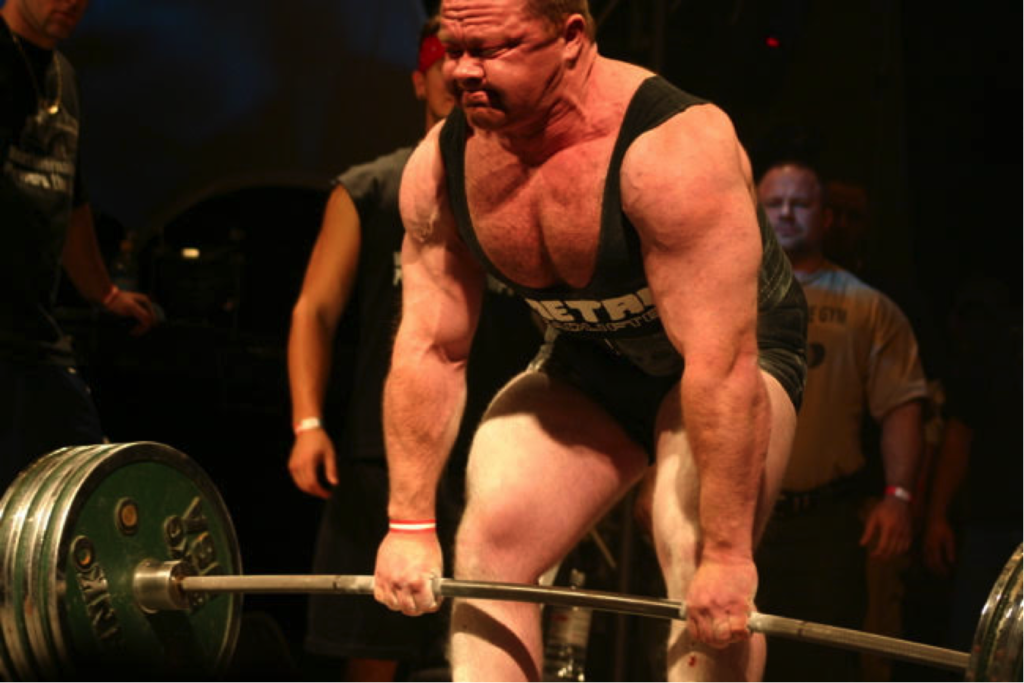
If you lift heavy weights long enough, you are probably going to experience low back pain. It’s something that almost all of my friends in the strength world have dealt with. Some of us have dealt with more than others. Some of us will allow this back pain to end our pursuit of strength, and I totally understand, trust me. Some of us will ignore the back pain until something major happens likes a fracture, bulging disc, or worse, paralysis. Yet some of us will take the time to learn about the low back and deal with the issue.
In 2004 I was diagnosed with two protruding discs of the lumbar spine. Most of my career I have just ignored the recommendations of doctors because they don’t get us. They assume that we (by “we” I mean strength athletes) are like everyone else and that we want a pain-free life. We don’t care about pain-free. We want to be the strongest people on the planet. We just want to be told how to deal with the pain.
[thrive_leads id=’9063′]
However, the doctor that was looking at my MRI was a friend who understood the strength world. He went to the Arnold Classic every year, and he loved strength sports. That’s what made his diagnosis that much more concerning to me. He warned that I was at risk for paralysis, but the issue that scared me the most was the fact that I could become impotent with just one wrong turn. I was scared. I was so close to breaking the all-time World Record of 2408lb. I was sure that I would break it that very year if I could only survive the training. However, I was faced with two options:
- Walk away and live a long and healthy life, and tell all of my children and grandchildren about what I almost did.
- Be proactive and figure this thing out.
Obviously, I chose number 2. The first thing I did was asked around to some of the veteran powerlifters, and one name kept coming up over and over, Dr. Stu McGill. I started reading everything that I could with his name on it. I also found my local practitioner, Dr. Lawrence Gray. Between the two of them, I was able to strengthen my back stronger than ever before. With the help of these two men, I was able to break that world record twice.
This article isn’t about my world records. This article is my advice to all of you on addressing the low back and strengthening the core. Most of you that read my work are people that love the barbell. This article is my gift to all of you in hopes that you will spend your life in a constant pursuit of strength. There are five specific areas that I want to bring to your attention so that you too can reach your full strength potential.
Back Hygiene, Capacity, and Movement Patterns
The low back is like a piece of taffy or plastic. If you bend it over and over, it will finally break. When it comes to ending back pain, a great place to start is making not of the way you move throughout the day. The spine is really not designed to bend over and over. The musculature is designed to support the spine with stiffness. Our bending should be done at the pelvis called a hip hinge. Olympic weightlifters normally perform this movement perfectly during their pull in the clean and snatch.
Every time that you flex the spine to pick things up or to put your shoes on, you are taking some of that capacity and pouring it out like a glass of water. That’s why so many of us think that we hurt our backs when we pick up a pencil or a basket of clothes. It’s not the pencil or the basket that hurt our back. It was the thousand other dysfunctional movements that we made prior to that incident. You flexed the spine to tie your shoe. You flexed the spine to pick up your child. All of these dysfunctional flexes of the spine led you your injury.
The first place that Dr. McGill starts is identifying pain triggers and observing movement patterns. The goal is to avoid any movement that triggers pain while cleaning the rest of your movement patterns up.
To improve your movement and back hygiene you need to:
- – Learn how to properly hinge at the hip
- – Maintain a neutral spine
- – Learn to brace causing proper proximal stiffness (this will allow for functional and proper movement patterns)
Hip Mobility is Key!
Have you heard of the Kinetic Chain? If not, you should. It’s a simple concept really: feet stable, ankles mobile, knees stable, hips mobile, low back stable, etc. If one of these elements gets messed up, the whole chain is compromised but we will focus on the hips in this article. If the hips get too tight or immobile, your low back will start to move more than it is supposed to. This movement will cause a shearing effect that can cause major issues with the low back. If the hips are moving properly, the low back can maintain its stiffness and integrity.
The hips perform three movements: abduction, extension, and external rotation. The goal is for the hips to perform these three functions properly and in a full range of motion. Everyone has a slightly different hip anatomy, so there isn’t a universal range of motion. The goal is to allow the hips to run through their own range of motion unrestricted. Hip mobility is great when performed with proper spinal stiffness. Hip mobility doesn’t have to be complicated. Here are a few movements that I recommend:
- – Fire Hydrants
- – Leg Swings (after a proper warm-up)
- – Half-Kneeling Psoas stretch
- – Side Lunges
Proper “Core” Training
First, we need to identify the musculature of the core:
- – Erector Spinae
- – Internal and External Obliques
- – Rectus abdominis
- – Transverse abdominis
- – Multifidi
- – All the muscles of the pelvis as well
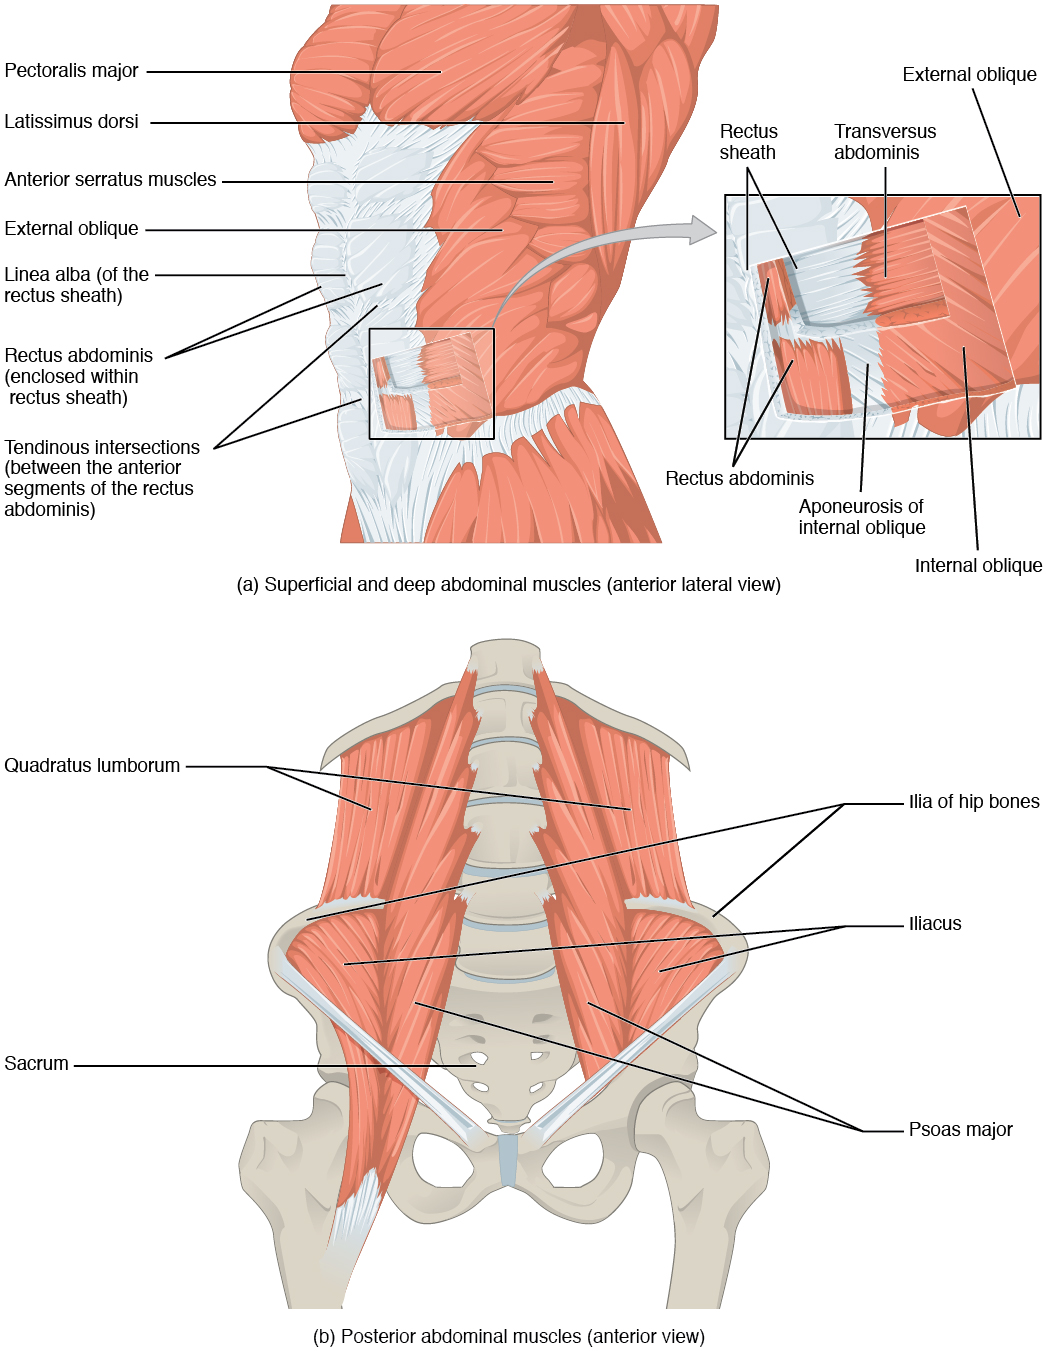
Sit-ups only work the rectus abdominis, psoas, and rectus femoris. Only the rectus abdominis supports the spine, while the psoas and rectus femoris act as hip flexors. The problem is that the psoas originates in the lumbar spine. Performing sit-ups causes unnecessary stress on the spine while acting as very little stability for the spine. Sit-ups cause major issues and provide very little core stability making it a very dysfunctional movement. As a matter of fact, most movements requiring spinal flexion are useless, unnecessary, and dangerous. As far as functionality, how many times per day do you really need to perform a movement like the sit-up? The answer is: about once per day when you get out of bed.
Otherwise, the goal is spinal stiffness. The best way to assure proper stiffness and bracing is with exercises like carries, planks, and sled drags. Most strength athletes spend most of their time with bilateral movements focused in the sagittal plane. Carries strengthen the core while working in the frontal plane. When strengthening the frontal plane with unilateral work, the musculature of the spine is forced to create stiffness proximally, so the distal musculature of the limbs can work. This stiffness is required to protect the spine in day to day life as well as athletically.
Unilateral Farmer’s Walks are both functional and protective for the low back.
Here are a few movements that we prescribe in our athletes’ weekly training programs:
| Exercise | Prescribed Starting Point |
| Unilateral Famers Walk | 3 x 20yd each arm |
| Bilateral Farmers Walk | 3 x 30yd |
| Kettlebell Carries Racked Position | 3 x 30yd |
| Asymmetrical Kettlebell Carries | 3 x 20yd each arm |
| Zercher Carries | 3 x 30yd |
| Axle Bar Overhead Carries | 3 x 30yd |
| Hi/Low Offset Kettlebell Carries | 3 x 20yd each side |
| Sled Drags | 3 x 20yd forwards and backwards |
| Prowler Pushes | 3 x 20 yards |
[thrive_leads id=’9063′]
We usually prescribe specific core work like this 2-3 times per week, but then there is The Big 3 that we recommend daily. Let’s take a look at that next!
The McGill Big 3
The McGill Big 3 consists of:
- – The McGill Curl Up
- – Side Planks
- – Bird Dogs
These three movements could easily be the three movements that allow you to train pain-free from now on because they have the unique ability to fire the fibers that create the muscle stiffness that supports the spine and eliminate the micro-movements of the spine that cause a majority of the pain. This stiffness can be felt for several hours after performing the movements. I recommend performing these movements first thing in the morning and prior to training.
First thing in the morning is the time to push the capacity of these three movements. When performing the movements before training, use the Big 3 to fire the fibers to just wake up the musculature that created the stiffness. A great warm-up for training would be:
- – Walk for five minutes
- – Hip Mobility: Leg swings, Fire Hydrants, and Half-Kneeling Hip Flexor Stretch
- – The Big Three
- – Bar Only Movement Specific Work
Find a Great Local Practitioner
This isn’t as simple as it sounds. I interviewed over ten different chiropractors and physical therapists before deciding on Dr. Lawrence Gray. Here are the things that I look for:
- – What athletes have they worked with?
- – What was the response of the athletes?
- – What services do they provide?
- – What is their assessment protocol?
- – What is their overall philosophy?
First, if the practitioner doesn’t work with athletes, I am not going to waste my time. A lot of physical therapists and chiropractors feed off of weak-minded people that don’t understand real pain and dysfunction. I am looking for a practitioner that has worked with not only athletes but also the best athletes. They will understand what we are after, and they will understand our expectations. I don’t really care about pain. I care about function. If I can perform the movement that I compete in, then I am a happy camper. Athletes simply want to pursue their sport.
I also want to know if the practitioner was actually able to produce the desired outcome of the athlete. Practitioners will brag all the time about the athletes they have worked with. I want to know if their services actually worked. You have to talk to the athletes to find out the real truth.
I am always interested in the services they provide and .look for services like:
- – Active Release Technique
- – Graston Technique
- – Dry Needling
- – K-Laser
- – Acupuncture
Second, if all they do is manipulate the spine, I am not interested. If they just want you to perform a few stretches and exercises, I am not interested. I am looking for innovation. Most athletes are looking for results and they want practitioners that will do what it takes to get those results.
Third, the assessment protocol is key. If they are simply throwing you into an X-Ray, they aren’t what I am looking for. A good assessment is performed with a functional movement screen. It should also include a symptomatic questionnaire. A good doctor can look at the way someone moves and along with his or her symptoms and pain triggers determine the problem. You can’t treat an athlete unless you can diagnose the problem.
Most of the time you can determine if your practitioner is a good one by asking them their overall philosophy. Are they into self-improvement? Are they invested in their own continued education? A great practitioner is always going to want to know more, to learn more, and to advance their practice. There are the practitioners that just want to chase ambulances. Those aren’t the ones that work with athletes. My chiropractor has one of those practitioners right beside him and it’s funny, actually. Dr. Gray is on one side, and this ambulance-chasing doctor is on the other side. The differences in the two are obvious.
I really hope this article helps all of you out there. If you are as serious about strength as I am, you are going to deal with low back issues. My advice is to follow the protocols of this article before you receive an injury. The way to deal with an injury is to never get injured. However, if I am too late, this article will give you a blow by blow for dealing with the low back and core. Good-luck in your quest for strength!
– Coach Travis Mash
When warming up with McGill’s big 3 (or building capacity first thing in the morning) is there any sort of “rep scheme” you’d recommend?
i.e…
15 bird dogs per side w 2-3 sec hold
3 x 30 sec side plank holds
20 curl ups
Just curious what is needed vs what might be too little/too much.